
Getting Started - Alienbrain Administration
Alienbrain Administration
This simple guide will demonstrate the basic features of Alienbrain administration to get up and running quickly.
More detailed notes are available in the Alienbrain Administration Guide found in the Alienbrain Documentation folder in the Windows Start Menu.
Connect to the Alienbrain Server
Run the Alienbrain administration tool in the Alienbrain Tools folder in the Windows Start Menu.

The Alienbrain Admin Tool
Connect to the Alienbrain Server by clicking the button with the ellipsis on the main screen, and selecting the server name (which should be listed).

Select server - click OK
Click on the Connect button on the main screen to login to the server. If this is the first time the administration tool has been used, or the Administrator password has not yet been updated, click OK to accept the default login details (the password will be blank).

Click OK
Add and Manage Projects
Select Create Project from the Project Database menu. Add a project name and description in the Create Project form and click the Create Project button. A default location for the database is provided although this could be changed to any storage on the network.

Add project details, then click Create Project
The new project will now appear in the list on the Active Projects screen (Project Database menu). Projects can be renamed here, or removed from the active list. Note that removing projects from the active list does not remove the data. Projects can also be locked/unlocked on this page, which is useful, for example, when projects are being moved to new storage on the network.

Managing projects
If you wish to import existing files or a whole project from an existing location into your new Alienbrain project follow the instructions in the Importing Existing Files to a new Alienbrain Project section on this page.
Add Users and User Groups
Users are created and assigned to user groups in the User Management Screen.
Select User Management from the Central Configuration Services menu to display the User Management screen.

Alienbrain User Management
Create a new user group by selecting New User Group from the Maintaining Users menu on the right pane. Add the name and description, and click OK.
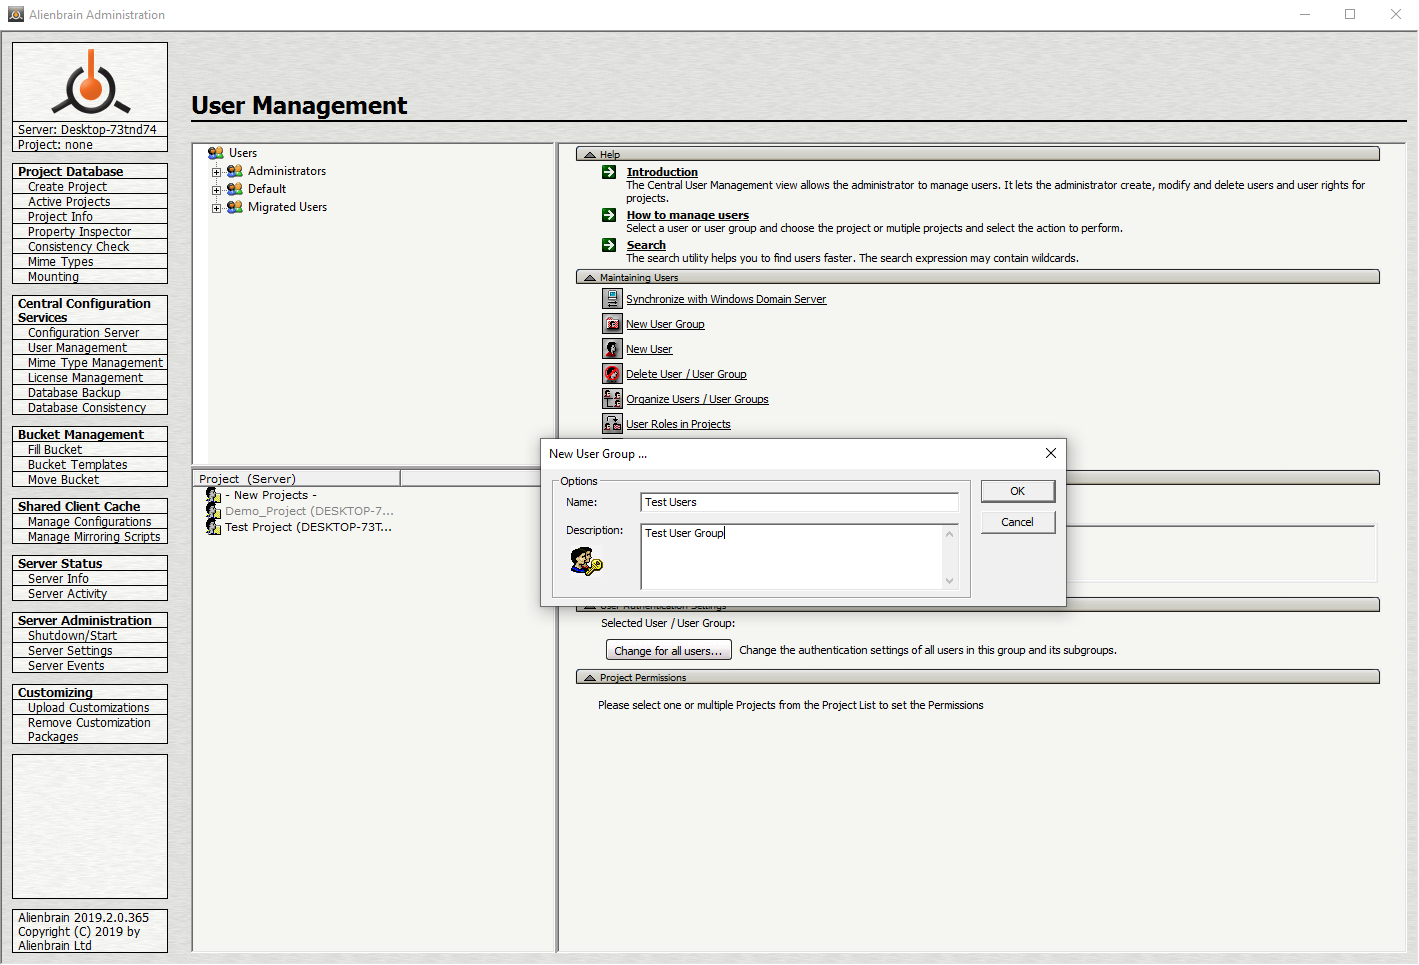
Creating New User Group
Add a user to a group by highlighting the required user group and selecting New User from the Maintaining Users menu. Add a name and description, and click OK.
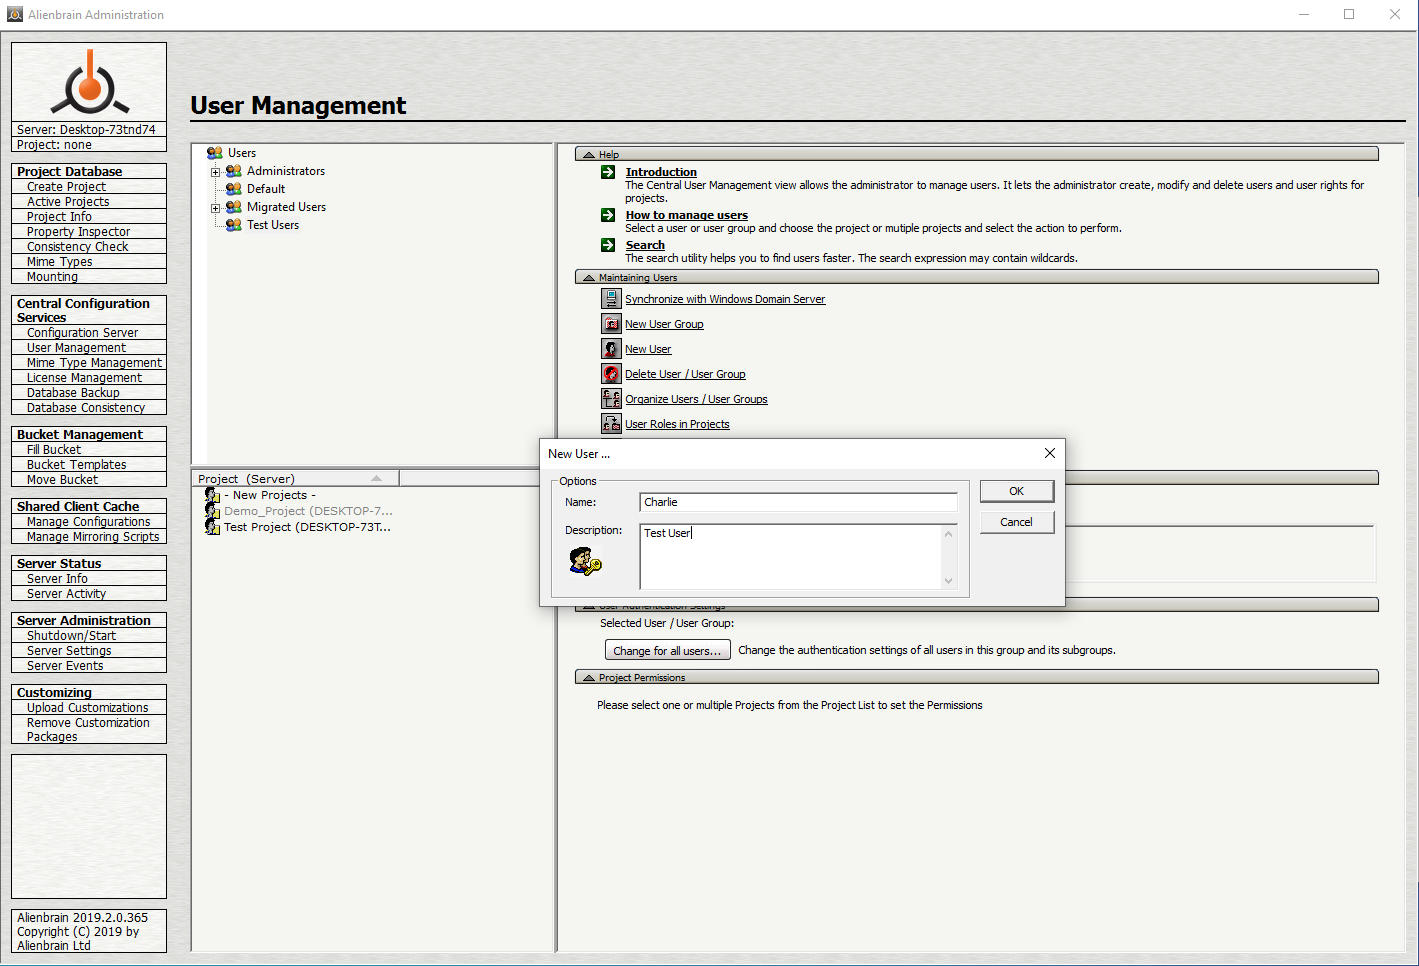
Creating New User
Assign Permisssions
Project Permissions can be applied to individual users or entire user groups. Users can be dragged into different user groups where they will inherit the permissions of the group.
Select a user or user group in the user list, and a project in the Project list to display the access permissions. Update by clicking on the radio buttons. If a user group has been selected, the permissions can be applied to all members of the group by clicking on Reset Children.
Note: The Demo Project is not initially enabled for permissions management. To do this, select the demo project from the project list, then click the button to synchronize with the CCS. The permissions settings should now be available.

Setting permissions
License Management
The license management screen shows the allocation of licenses on the selected server (2 available for the evaluation download). Although the Alienbrain installation installs a server and client on the same machine, unless the client is used (i.e connects to a project), it will not consume a license. Alienbrain clients could therefore be installed on two further machines with the evaluation download.
Further licenses can be requested on this page (Ask Support for new Evaluation Key), and new licenses, once received, can be added (Browse for Registration File). This page also displays the hardware ID of the server which is provided to Alienbrain support should you go ahead with a purchase of a license or need extra licenses for evaulation.

License Management
Import Existing Files to an Alienbrain Project
Existing files are imported into an Alienbrain project via the Alienbrain Client browser in a two step process. Files can also be imported directly within the creation tools which have an Alienbrain integration, though this will be discusssed on the Tool Integrations page.
Step 1 - Connect to the Project Database
If it is a new project - ensure that the project has been created in the Admin Client as detailed the Add and Manage Projects section above.
Launch the Alienbrain Client and right click on the Alienbrain logo at the top of the Tree View. Select the Connect to Project Database... option to confirm permission to access the list of project databases.

Confirm permission to access the list of project databases.
Click OK on the login prompt to confirm that you are allowed to access to the list of project databases.

Click OK to confirm access to the project database list.
The project will be displayed in the Projects list. Select it and click OK.

Select the project and click OK.
A login prompt will be displayed to login to the project. Click OK to login and display the project files in the Tree View of the Alienbrain browser.

Click OK to login to the project.
Step 2 - Import the files
There are two ways to import external files into the Alienbrain database after the project has been created in the Alienbrain Admin Client.
Method 1
Drag the external files from a Windows File Explorer into the Alienbrain Client Browser, and drop them onto the Alienbrain Project Folder in the Tree View. After the files are dropped, an import window is displayed where an initial import comment should be entered.
Drag the files onto the Project Folder, enter an import comment and click OK.
Method 2
Copy the external files into the Project Folder on the drive mapped to the Working Folder (typically the Z:\ drive) in a standard Windows File Explorer.
Press the refresh
 button in the Alienbrain Client to view the files.
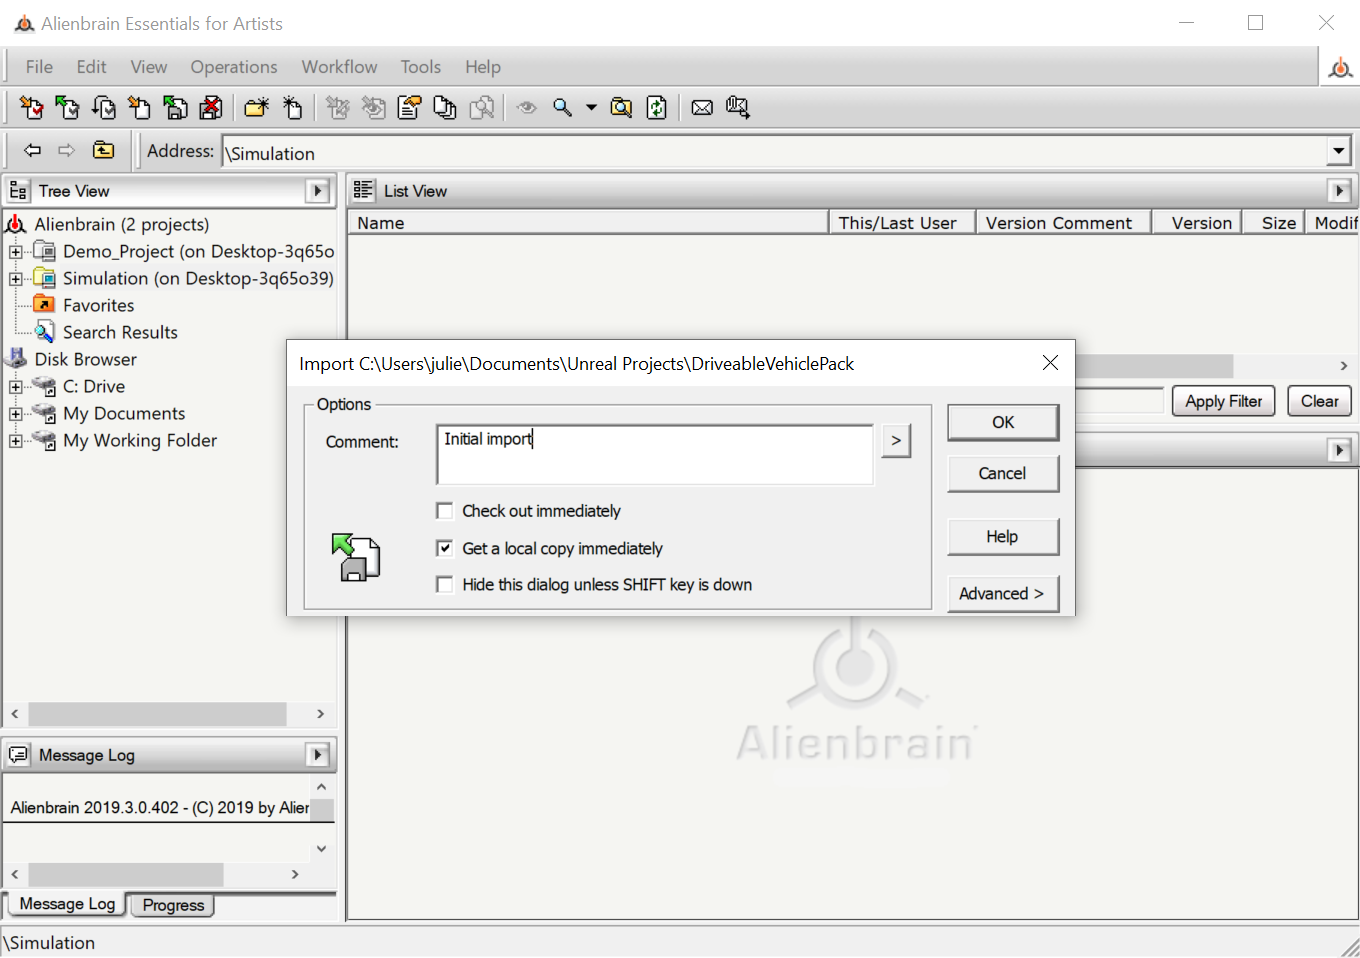
Right click on the Project Folder in the Alienbrain Client Tree View, select Import from the menu and enter an import comment in the pop up.
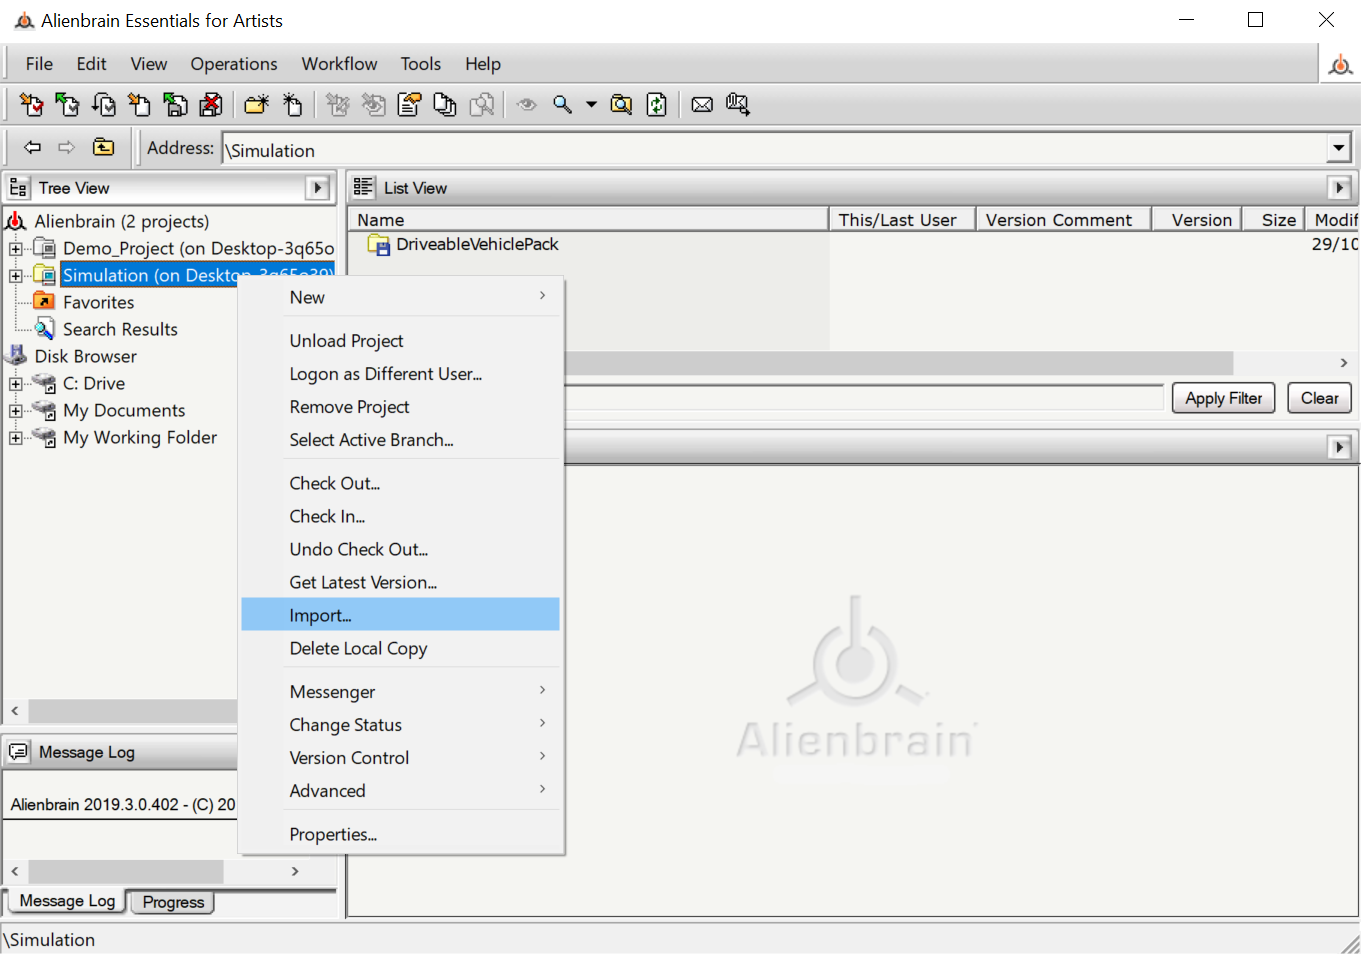
Select Import, enter an import comment and click OK.
On completion of either of these methods, the external files will be stored in the Alienbrain database (C:\alienbrain_Assets, and C:\alienbrain_Projects
on the Alienbrain Server by default) and are accessible in the Alienbrain browser.

New project files displayed in the browser.
The local files on the Client Machine are stored in the Working Folder which is located by default in the C:\alienbrainWork folder (for example C:\alienbrainWork\Simulation). The files should be accessed and updated however via the mapped drive (for example and Z:\Simulation), particularly for teams using creations tools with models that reference other files such as 3ds Max and the Unreal Engine.
Version control functionality is accessed in the Alienbrain Client from the menu displayed by right clicking on files or folders, and is described in more detail in the User Guide. The User Guide is accessesed from the Alienbrain Client Help menu, or from the Alienbrain Documentation folder in the Windows Start Menu. This functionality is also available within the creation tools where Alienbrain integrations are available. See Tool Integrations.
Next:
Configure and run the Alienbrain client:
CLIENT CONFIGURATIONInstall additional Alienbrain Clients on different machines:
CLIENT INSTALLATIONInstall and configure the creation tool integrations:
TOOL INTEGRATIONS